Disc Degeneration Exercises
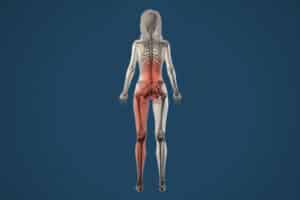
You’ve just been in a car accident – and discovered a demanding lower back pain as a result. You may also find this pain has spread into your legs, and is made much worse by sitting which are lumbar (low back) disc herniation symptoms. You receive an MRI or X-ray only to discover that you have disc degeneration, a disc bulge, or disc herniation.
Remember to consult with your physician or physiotherapist before starting an exercise program to determine if there are any specific exercises you should avoid.
My MRI Says I Have Lumbar Disc Degeneration! Now What?
Disc degeneration is more common than you might think. On average, 30% of 20 year olds have some form of disc degeneration, narrowing, bulge, or herniation, with that number rising to approximately 50% of 40 year olds – and they are entirely pain free. This is because as we age, our discs begin to lose water and become less spongy, resulting in wear and tear on the joint. Disc degeneration is a normal part of aging, and usually not a problem. Your sweet mother or grandmother has a few wrinkles on her face, but you wouldn’t say she has “degenerative skin disease”?
The majority of people with disc degeneration present with no symptoms, and the most common location for disc degeneration is between the 5th lumbar vertebrae and the 1st sacral vertebrae. This joint acts as a load bearing hinge between our upper and lower body, and is where the spine experiences the most compressive force (up to 250% our body weight when bending over at the waist). The key to reducing that compressive force is to strengthen the muscles of our trunk and core, which act as “force sponges” and prevent excessive stress through the joint. Let’s get started with safe disc degeneration exercises!
EXERCISES TO DO - THE MCGILL “BIG 3”
Famously moustachioed Canadian Dr. Stuart McGill recommends 3 exercises to perform regularly to combat lower back pain. These “Big 3” exercises are specifically designed to reduce load on the back while maximizing core engagement. They all involve bracing the core as a key component for performing the exercise, so before we begin, let’s learn how to brace our core.
Bracing Your Core
Brace your core by pressing your hands 6 inches to the side of your belly button – just above where the pockets are on your shorts. When you push into your abdominal wall with your fingers, gently push back out with your core muscles – don’t let your fingers in. Think of how you would firm up your core if punched in the stomach. Slowly exhale during this contraction and keep the core contraction very light.
Bracing your core acts as a “back guard” by locking your lumbar spine in place through increasing intra abdominal pressure.
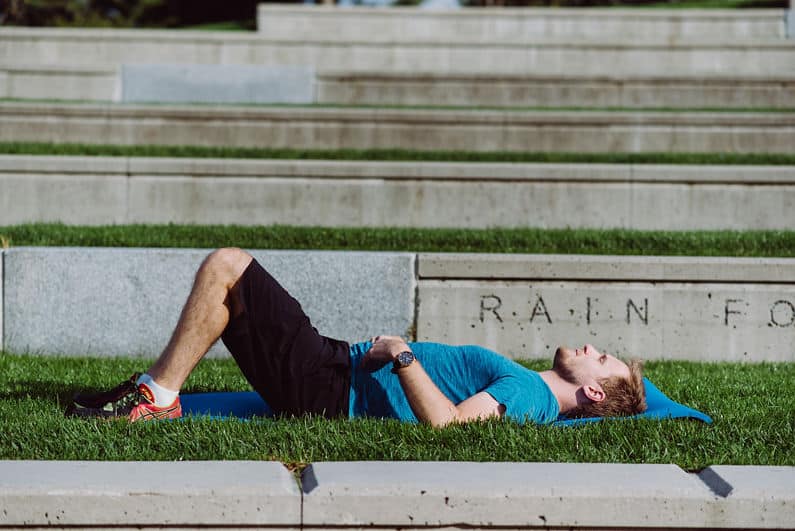
Lie on the floor on your back, knees bent and fingers push into the side of your stomach.
Recommended – Try 5 reps holding for 5 seconds, progressing to 10 seconds when you feel more comfortable.
Note – avoid holding your breath during this exercise.
1. The Curl Up
Getting into position:
• Begin lying on your back
• The knee on the side you receive more back pain is bent
• One hand is placed under the lower back for support
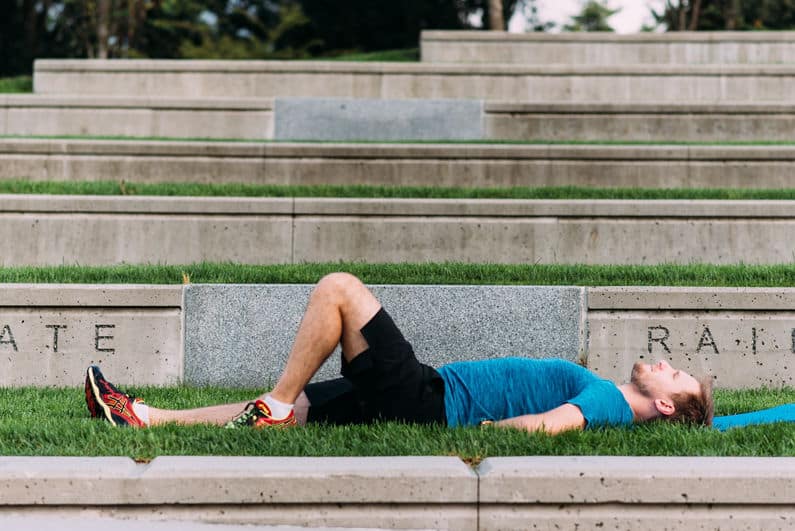
Performing the curl-up:
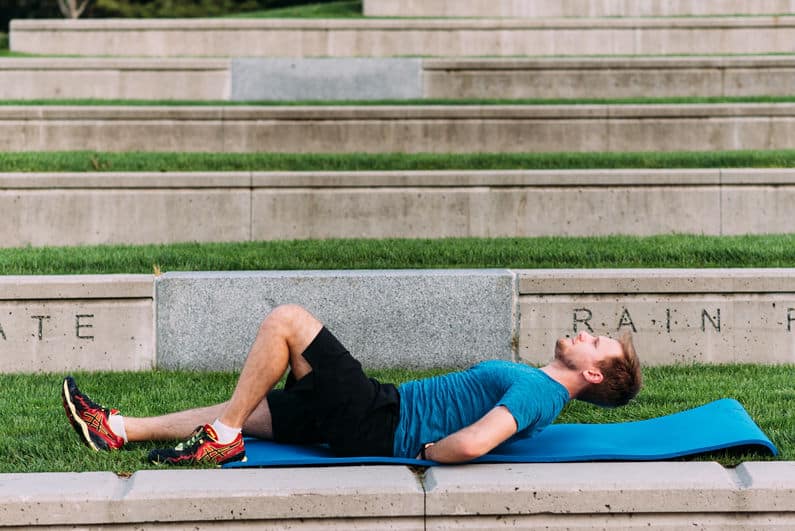
Brace the core and hold throughout the movement.
• Lift the head and shoulders a short distance off the floor
• Do not produce any movement in the head and neck (no flexion or chin tucking). Lead with your shoulders/chest, not your head!
• Try to picture the rotation point being in the bottom of the ribcage and view the head and neck as a block that should be lifted as a whole
Recommended: 5 reps with 5 second holds (exhaling).
Primary Muscles Worked:
• Rectus Abdominis
• Transvere Abdominis
• External Obliques
2. The Bird Dog
Getting into position:
• Start in the 4 point position. Knees are directly underneath hips, hands are directly underneath shoulders. Lower back is relaxed – not too arched, not too flat.
• Brace core muscles – and hold throughout movement.
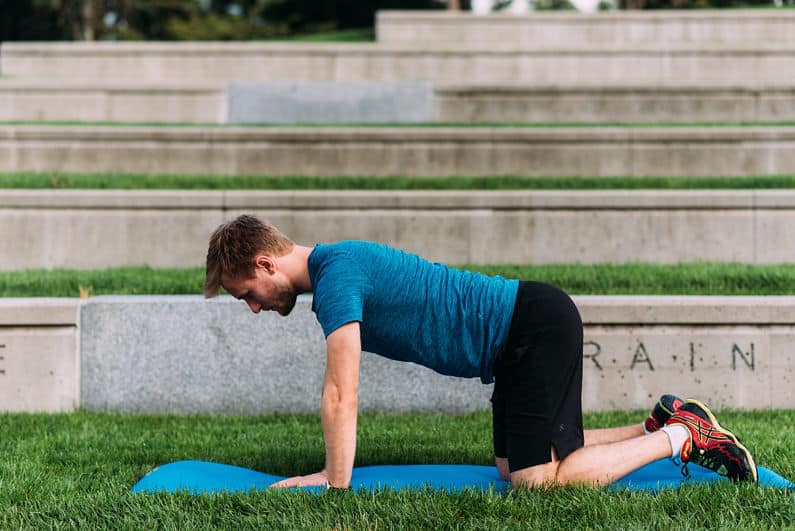
Performing the bird dog:
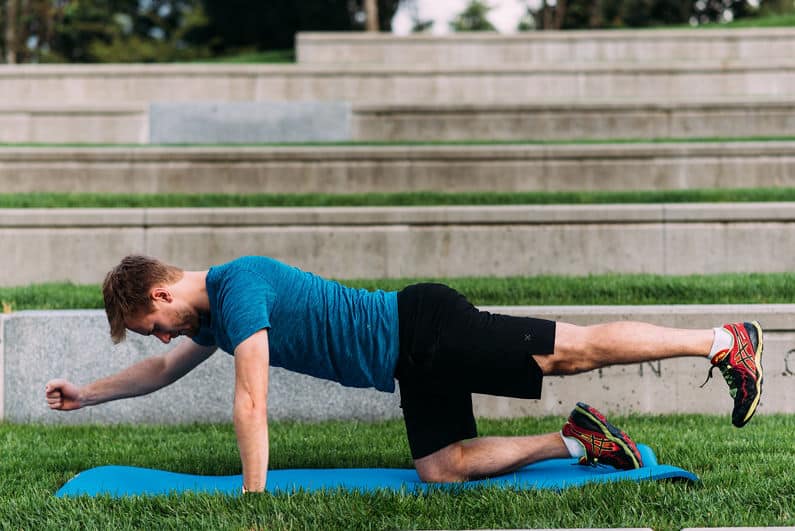
• Maintain a steady abdominal breathing while you lift one leg directly backwards behind you
• Raise your opposite arm to shoulder height.
• Do not allow yourself to tilt, stay as still as you can.
Recommended: 5 reps per side with 5 second holds.
Primary muscles worked:
• Rectus Abdominus
• Latissimus Dorsi
• Erector Spinae
• Quadratus Lumborum
3. The Side Plank
Getting into position:
• Lie on your side with your knees bent to approximately 45 degrees.
• Dig your elbow into the mat for support.
• Make sure your hips and trunk doesn’t sag towards the ground.
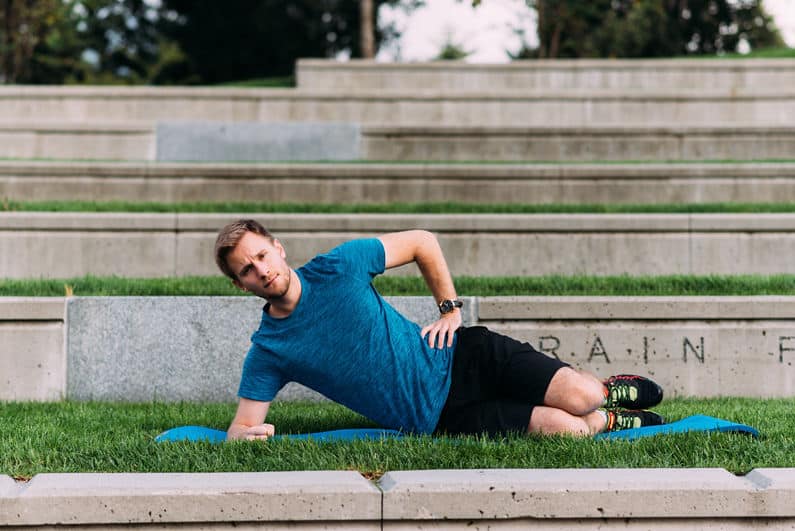
Performing the side plank:
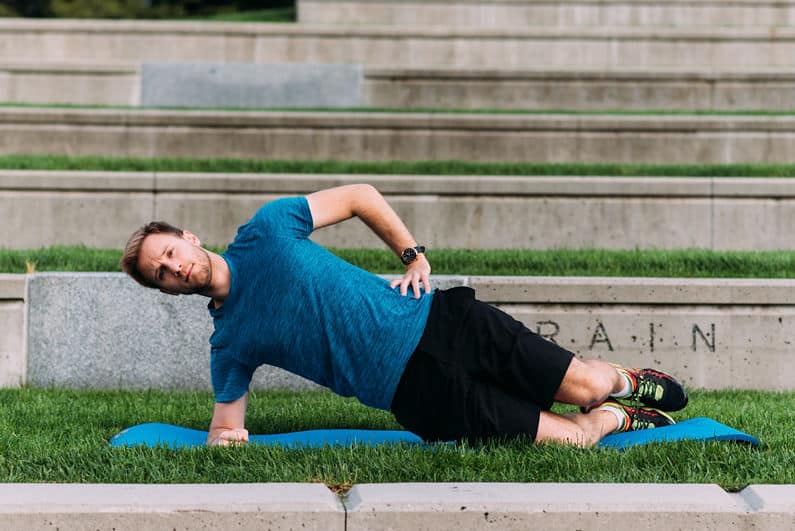
• Brace your core
• Continue to push your elbow into the mat.
• Bring your hips forward and straighten your thighs to lift your pelvis off the ground.
Recommended 5 reps per side with a 5 second hold.
Primary Muscles Worked:
• Transverse Abominis
• Internal Obliques
• Serratus Anterior
• Medial Deltoid
Perform these exercises 2-3x per week for back pain relief and core strengthening.
These exercises will help you to manage lower back pain associated with disc degeneration! For more information on how you can help low back related injuries or conditions click physiotherapy.
References
1.Brinjikji, W., Luetmer, P. H., Comstock, B., Bresnahan, B. W., Chen, L. E., Deyo, R. A., … Jarvik, J. G. (2015). Systematic literature review of imaging features of spinal degeneration in asymptomatic populations. AJNR. American journal of neuroradiology, 36(4), 811–816. doi:10.3174/ajnr.A4173
2.Exercises for Spine Stabilization: Motion/Motor Patterns, Stability Progressions, and Clinical Technique. McGill, Stuart M. et al. Archives of Physical Medicine and Rehabilitation, Volume 90, Issue 1, 118 – 126
3.Pfirrmann, C. W., Metzdorf, A. , Elfering, A. , Hodler, J. and Boos, N. (2006), Effect of aging and degeneration on disc volume and shape: A quantitative study in asymptomatic volunteers. J. Orthop. Res., 24: 1086-1094. doi:10.1002/jor.20113


